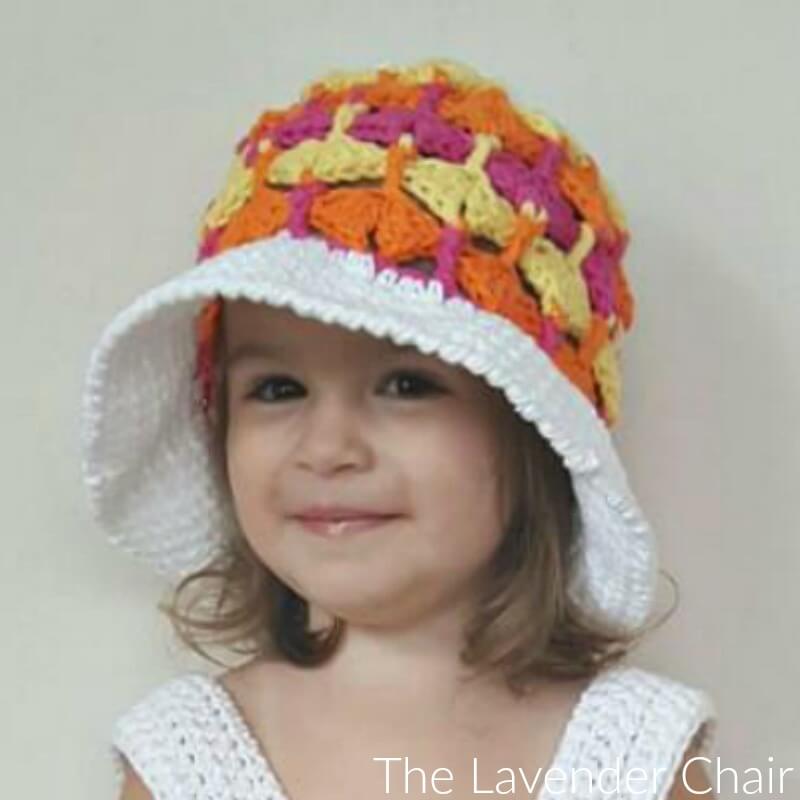


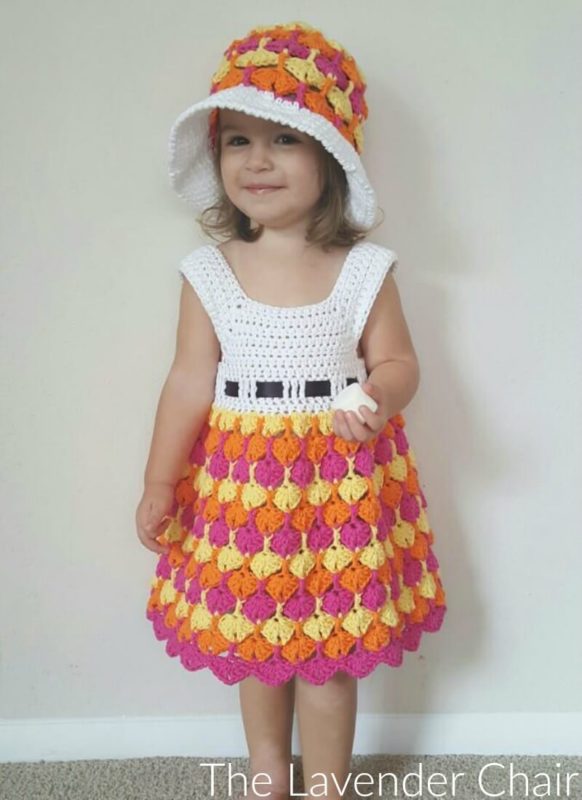
A few days ago the most recent part of the Wonder CAL 2016 was released. This portion of the CAL was designed by Dedri Uys of Look What I Made. This stitch pattern has been unofficially named Quiver Fans! Isn’t it gorgeous?
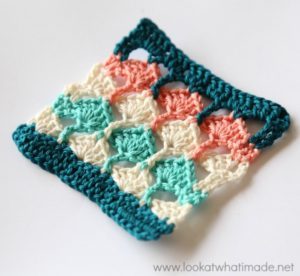
I fell in love with the Quiver Fans stitch instantly and just had to design something around it! I contacted Dedri and asked her if I could use this gorgeous stitch in a few of my upcoming designs! So, here is one of the designs I came up with! Be sure to check out the Look What I Made Link above so you can see more detailed images on how to do this stitch technique in rows.
Materials:
Worsted Weight Cotton Yarn (300 yards)
H 5.00mm Crochet Hook/I 5.50mm Crochet Hook
2 Buttons
Ribbon
Yarn Needle
Size(s):
Fits most toddlers size 24 months – 3t
Difficulty:
Intermediate
Gauge:
4 Hdc = Approx. 1 inch
Stitches:
Slip Stitch (SS) – Insert hook into stitch. Yarn over. Pull through stitch and loop.
Chain (Ch) – Yarn over. Pull through loop.
Single Crochet (Sc) – Insert hook into stitch. Yarn over. Draw up loop. Yarn over. Pull through 2 loops.
Half Double Crochet (Hdc) – Yarn over. Insert hook into stitch. Yarn over. Draw up loop. Yarn over. Pull through 3 loops.
Double Crochet (Dc) – Yarn over. Insert hook into stitch. Yarn over. Draw up loop. Yarn over. Pull through 2 loops. Yarn over. Pull through 2 loops.
Treble (Tr) – Yarn over 2 times. Insert hook into stitch. Yarn over. Draw up loop. Yarn over. Pull through 2 loops. Yarn over. Pull through 2 loops. Yarn over. Pull through 2 loops.
Special Stitches:
Front Post Treble Crochet (Fptr) – Yarn over twice. Insert hook through the stitch from the front to the back and around the stitch. Yarn over pull through stitch. Yarn over pull through 2 loops. Yarn over pull through 2 loops. Yarn over pull through 2 loops.
Notes:
- Turning chain does NOT count as your first stitch (unless otherwise specified). So, when working flat, be sure to work your first stitch in the very frist stitch. And when working in the round, be sure to work your first stitch in the same stitch as join.
- Use H 5.00mm Crochet Hook for size 24 months and size I 5.50mm Crochet Hook for size 2 and 3.
- Drop Stitches are worked into the row previous.
Bodice Video Tutorial:
Instructions:
Ch 66
Row 1: Hdc in the third Ch from hook and in the next 4 Chs. [Hdc. Ch 1. Hdc] in the next Ch. Hdc in the next 19 Chs. [Hdc. Ch 1. Hdc.] in the next Ch. Hdc in the next 12 Chs. [Hdc. Ch 1. Hdc.] in the next Ch. Hdc in the next 19 Ch. [Hdc. Ch 1. Hdc.] in the next Ch. Hdc in the remaining 5 Chs.
Row 2: Ch 1. Hdc in the same stitch and in the next 5 stitches. [Hdc. Ch 1. Hdc] in the Ch 1 space. Hdc in the next 21 stitches. [Hdc. Ch 1. Hdc.] in the Ch 1 space. Hdc in the next 14 stitches. [Hdc. Ch 1. Hdc.] in the Ch 1 space. Hdc in the next 21 stitches. [Hdc. Ch 1. Hdc.] in the Ch 1 space. Hdc in the remaining 6 stitches.
Row 3: Ch 1. Hdc in the same stitch and in the next 6 stitches. [Hdc. Ch 1. Hdc] in the Ch 1 space. Hdc in the next 23 stitches. [Hdc. Ch 1. Hdc.] in the Ch 1 space. Hdc in the next 16 stitches. [Hdc. Ch 1. Hdc.] in the Ch 1 space. Hdc in the next 23 stitches. [Hdc. Ch 1. Hdc.] in the Ch 1 space. Hdc in the remaining 7 stitches.
Row 4: Ch 1. Hdc in the same stitch and in the next 7 stitches. [Hdc. Ch 1. Hdc] in the Ch 1 space. Hdc in the next 25 stitches. [Hdc. Ch 1. Hdc.] in the Ch 1 space. Hdc in the next 18 stitches. [Hdc. Ch 1. Hdc.] in the Ch 1 space. Hdc in the next 25 stitches. [Hdc. Ch 1. Hdc.] in the Ch 1 space. Hdc in the remaining 8 stitches.
Row 5: Ch 1. Hdc in the same stitch and in the next 8 stitches. [Hdc. Ch 1. Hdc] in the Ch 1 space. Hdc in the next 27 stitches. [Hdc. Ch 1. Hdc.] in the Ch 1 space. Hdc in the next 20 stitches. [Hdc. Ch 1. Hdc.] in the Ch 1 space. Hdc in the next 27 stitches. [Hdc. Ch 1. Hdc.] in the Ch 1 space. Hdc in the remaining 9 stitches.
DONT TURN. Continue on to button band.
Button Band:
Row 1: Ch 1 (Counts as first Sc.). Sc in the Side of row 5 and in the side of row 4. 2 Sc in the side of row 3. Sc in the side of row 2. 2 Sc in the side of row 1. (7Sc + Ch 1)
Row 2 – 4: Ch 1 (Counts as first Sc.). Sc across. (7Sc + Ch 1)
DON’T TURN. Continue on to Arm Shaping
Arm Shaping and Skirt:
Round 1: Ch 1. Make 1 Hdc in the side of row 4, 3, 2, and 1 form Button band. Hdc in the next 10 stitches. Hdc in the Ch space. Ch 5. Skip the next 29 stitches. Hdc in the Ch 1 space. Hdc in the next 22 stitches. Hdc in the next Ch 1 space. Ch 5. Skip the next 29 stitches. Hdc in the next Ch 1 space. Hdc in the next 10 stitches. Join with a SS to the first Hdc made. (50Hdc + 2 Ch 5 spaces)
Round 2: Ch 1. Hdc in each stitch and Ch stitch around. Join with a SS to the first Hdc made. (60 Hdc)
Round 3: Ch 3. Tr in each stitch around. Join with a SS to the first Treble made. (60 Tr)
Round 4: Ch 1. Hdc in each stitch around. Join with a SS to the first Hdc made. (60 Hdc)
Round 5: Ch 1. *Sc. 3Dc in the next stitch. Ch 2. 3Dc in the next stitch.* Repeat from * to * around. Join with a SS to the first Sc made.
Change Colors
Round 6: Ch 3. *Front Post Tr around the next Sc. Ch 2. Sc in the next Ch 2 space. Ch 2.* Repeat from * to * around. Join with a SS to the first Tr made.
Round 7: Ch 2. *(3Dc. Ch 2. 3Dc.) In the next stitch. Skip the next Ch 2 space. Sc in the next stitch. Skip the next Ch 2 space.* Repeat from * to * around. Join with a SS to the first Dc made.
Change Colors
Round 8: SS into the next 3Dc and next Ch space. Ch 1. *Sc in the next Ch 2 space. Ch 2. Drop Front Post Tr Around the next Sc. Ch 2.* Repeat from * to * around. Join with a SS to the first Sc made.
Round 9: Ch 1. *Sc. Skip the next Ch 2 space. (3Dc. Ch 2. 3Dc.) Skip the next Ch 2 space.* Repeat from * to * around. Join with a SS to the first Sc made.
Change Colors
Repeat round 8 – 9 until desired length is reached.
Finish off. Weave in ends.
Button Holes:
Join with a SS to the side of Row 1.
Row 1: Evenly Sc 10 across the sides of row 1 – 7. (10 Sc + Turning Ch 1)
Row 2: Ch 1 (Counts as first Sc.). Sc across. (10 Sc + Turning Ch 1)
Row 3: Ch 1 (Counts as first Sc.). Sc in the next stitch. Ch 2. Skip 2. Sc in the next 2 stitches. Ch 2. Skip 2. Sc in the next 3 stitches. (6Sc + 2 Ch 2 spaces + Turning Ch 1)
Row 4 – 5: Ch 1 (Counts as first Sc.). Sc in each stitch across. (10Sc + Turning Ch 1)
Finish off Weave in ends.